Monday, December 28, 2009

Wing Tattoos

Tattooing is an art wherein several designs are created on different parts of the body such as lower back, arms, back andfairy-tattoo shoulders. It is common these days to spot several people with tattoos worldwide. You can create several designs such as Aztec tattoos, angel wing tattoos and angel tattoos.


Angel tattoos are well known tattoos especially meant for women. However, men also flaunt angel tattoos. It usually has a design which has Cherubs sitting on a cloud or as an avenging angel. Today, most people sport angel tattoos for these are beautiful. Moreover, if you have an angel tattoo on your body, you would not be ashamed of being in a swimsuit.

Angel Tattoos Design

* Archangels
* Cherubs
* Fallen Angels
* Guardian Angels
Significance of Angel Tattoos

Most of the youngsters create angel tattoos for they simply like the design of the tattoo. Others wear it for they believe in the Biblical sentiment. There are some who create this design to spread the positive energy.


Angel Tattoos for Women

An angel tattoo on a woman implies her purity. It also signifies her patience and divine nature. It shows that she believes in herself and that her self confidence is important. She wants to protect herself as well as others. Women with angel tattoos also reveal the fact that they want just the best in life.

Angel Tattoos for Men

It is said that angel tattoo on men signify that they respect women in every way. It also shows that they would love their beloved to the core.


Wednesday, December 23, 2009

Body Tattoos Designs


Tattoo Removal

How does it work?


A new study came out last summer that better explains how the lasers work. When the ink was first put into your skin, some of it immediately washed away through your lymphatic system. Your body tried to remove the rest, but it couldn't digest the ink, so it walled it off. Now, to remove the ink, we need to break it out from behind those walls. To do that, we shine a very brief flash of laser light at the ink. This sudden burst of energy will momentarily heat up the ink causing a flash of steam that will burst open the wall holding it. Now the ink is free to move around, and some of it will naturally wash away through your lymphatic system. It takes about 8-10 weeks for your body to build up new walls, so after 8 weeks, you come back to the clinic, and we repeat the treatment. Eventually, after a series of treatments, all of the ink washes away. The number of treatments needed, depends on the characteristics of your tattoo and the lymphatic drainage of that part of your body. Some colors come off faster, some slower. Some tattoos contain more ink, some less. Some parts of your body drain faster and some slower. Typically, it will take around 10-11 treatments to get a good result.


Then why different lasers?


Different colors of ink absorb different colors of light. For red, orange, yellow and purple ink we use a laser called a q-switched KTP For black and blue ink we use a laser called a q-switched Nd:Yag. Many people involved in tattoo removal will try to use the Nd:Yag laser to remove green ink, but it's not very effective. Therefore, because this is all that we do, we have also purchased a laser called a q-switched Alexandrite. This laser treats green ink and light blue ink very well. We also frequently use it for black ink. An Alexandrite laser is a very specialized and expensive laser, and as such, we are the only practice in the state of Minnesota to have one.


Will it be removed completely?

The answer is almost always yes. We will keep working on your tattoo until it's gone and you are satisfied. If, at some point, it is clear that it's not going to come off any better without causing side effects, we can change to a non-laser system such as Tat-gone-ink, where we tattoo in a solution that draws out the ink. In any event, we will do our best to remove your tattoo completely.

Are there any complications?

The benefit of laser removal is that complications are limited. The majority of our patients suffer no complications during the process. If done carefully, scarring is a rare event. You can get some darkening of the skin, though this is usually temporary. The vast majority of people who get darkening are of Asian ancestry, and they have the same thing happen whenever they get a cut or abrasion. You can get some lightening of the skin also. This is much more likely to occur if you are excessively tan, so we recommend limited tanning during the removal. If you have dark colored skin, we will select lasers and techniques to minimize the possibility of lightening. Some colors of ink, such as white and flesh tones, turn black when exposed to laser light and can be difficult to remove. For these colors, if the lasers are not working well, we will use the Tat-gone-ink system. This system involves using a tattoo machine to inject a solution that draws out the tattoo ink.


Are there other ways to remove a tattoo?

Yes and No. There are other methods, but none of them are very attractive. The Tat-gone-ink product is the only other method that seems worth trying. It can be effective. The problem is, that it is more painful, and is more apt to cause scarring. That is why we only use it as a last resort. The other options are much worse. Wrecking Balm has been advertising a lot lately. It is the new introduction of an old product. If you look closely at their pictures you will see the words "results not typical" usually written in small print and upside down. This is literally just repackaged wart remover. Another option is bleaching cream. If you're Swedish, this works reasonably well, but for the rest of us, it leaves a large white spot. Then there is Salabrasion, where you vigorously rub salt on the tattoo like sandpaper. Of course, that leaves a scar. Lastly, you can have it cut out or skin grafted, but again, you end up with a big scar. As you can see, laser removal is the only realistic option available.

Tattoo Studio

Look for the following items. If you don’t see them, ask the artist about them. If the artist tells you they are unnecessary or “overkill,” leave immediately and go look for another studio. Your health is more important than the risk of using a tattoo artist that is less than totally dedicated to the safest practices in his or her studio.

1. Autoclave - an autoclave is used in hospitals to sterilize equipment. It uses heat, steam, and pressure to kill every organism on the equipment. It usually takes about an hour for an autoclave to run a cycle from a cold start to effectively kill all organisms. You can even ask to see the autoclave and sterilization certificate. The tattoo artist should first clean the equipment and then place it in a special pouch before placing it in the autoclave. There is a strip on the outside of the pouch that indicates when the equipment is sterile. The needle bar and tube are reusable pieces of equipment that must be sterilized before each use.


2. Single Use Items

Single use items should be used only once so that the chances of cross contamination are eliminated. The single use items include:

Ink

Ink cups

Gloves

Needles

Most of these items are purchased in sterile packaging that should be opened in front of you just before the artist begins work.


3. Sharps/Biohazard Container

Used needles and objects that have come into contact with blood or bodily fluids should be disposed of in a sharps/biohazard container.

4. A universal container for any ointment, ink, water, etc. should not be used especially if any of these items have been removed from the container to be used on a client.

5. Some studios are required by law to have a sink in the work area supplied with both hot and cold water. Even if it isn’t required by law in your area, it only makes sense to have one for the cleanliness of the studio.


Tuesday, December 22, 2009

Tattoo Machine

How many times have you seen actors in movies sporting tattoos and how many times have you thought about getting one. Such instances may be many, except for those who might not be interested in tattoos. But for those who think it is interesting and are actually churned by the idea of getting that piece of art done permanently on your body this article would make some sense. And the fact is that the percentage of people interested in tattoos is actually growing in a decent pace. So isn’t it wise to learn the important aspects of the tattooing technique. Wouldn’t it be worth knowing. I personally thought it would be and dedicate this article to all those who have any form of interest in this wonderful art form.


To put it simply, artist make tattoos by injecting ink (yes tattoo ink, although of a different type) into a person’s skin. For achieving this they use a tattoo machine which in many ways look like a dental drill. Oh gosh!! We already started talking about drills. But we have to since it is all about getting under the skin. Anyways lets move ahead. So the electric powered machine moves a solid needle up and down to puncture the skin between 50 and 3,000 times per minute. The needle penetrates the skin by about a millimeter and deposits a drop of insoluble ink into the skin with each puncture.


Surprisingly despite of so much of technological advancement the tattoo machine has remained almost same since the time it was invented by Samuel O’Reilly in 1800s. He took the idea from the creation of another great, Thomas Edison. Edison’s autographic printer (used for engraving) served as the motivation behind O’Reilly’s tattoo machine. The main components of the tattoo machine are:

1. A sterilized needle
2. Tubes for drawing the ink through the machine
3. An electric motor
4. A pedal used to control the vertical motion of the needle

The tattoo that you see on the skin of anyone is the ink structure that you see. This ink is deposited in the dermis, the inner (or second layer of the skin). The ink is visible through the first layer of skin called the epidermis (Look at the skin structure photo). The ink stays in the dermis, which is the more stable part of the skin layer, for the entire life of the person.


Now let us look into the various steps involved in creating a tattoo:

1. Preparation Work: As we can understand that making a tattoo involves puncturing the skin and therefore there would be bleeding. So, that means there is always a chance of infection and disease transmission. Thus is requires some precautionary steps to be taken. To eliminate the possibility of contamination, most tattoo materials, including inks, ink cups, gloves and needles, are single use. The other materials used in repeated manner are sterilized under special conditions. The only valid way of sterilizing them is using a autoclave – heat/steam/pressure unit which is also used in hospitals.

Before working on the client the artists wash and inspect their hands for cuts and abrasions. Then, they has to take care of the following things:

* Disinfect the work area with an EPA-approved viricide.
* Place plastic bags on spray bottles to prevent cross-contamination.
* Explain the sterilization process to the client.
* Remove all equipment from sterile packaging in front of the client.
* Shave and disinfect (with a mixture of water and antiseptic soap) the area to be tattooed.

2. Creating the design:

The client either chooses a design brought by him/her or finalizes a design from the design gallery of the studio. Once the design is finalize the artist creates and outline of the design in the skin of the client. Then the following three important steps are carried out:

a) Black Work:
This is the stage where the artist draws with a permanent line over the blueprint drawn on the skin of the client. The artist use a single-tipped needle and thin ink to achieve the desirable permanent output. It is very important to understand how much to puncture since both more or less of it can be detrimental to the tattoo. If the puncture is more it would cause more blood and pain and if it is less it creates an uneven design.


b) Shading:
After cleaning the area with soap and water, the artist uses a thicker ink and a variety of needles to create an even, solid line. Improper technique during this step can cause shadowed lines, excessive pain and delayed healing.


c) Coloring:
Depending on the type of design and the coloring requirement of the design the artist puts on lines of color to ensure a smooth finish.


d) Final cleaning and bandaging:
Once the tattoo is complete, the artist ensures that he is cleaning the tattoo properly to remove all the plasma and blood. Once that is done the artist puts on a sterile bandage. The amount of bleeding is very minimal and it stops after just few minutes. The client is instructed to put on the bandage for 2-3 hours.

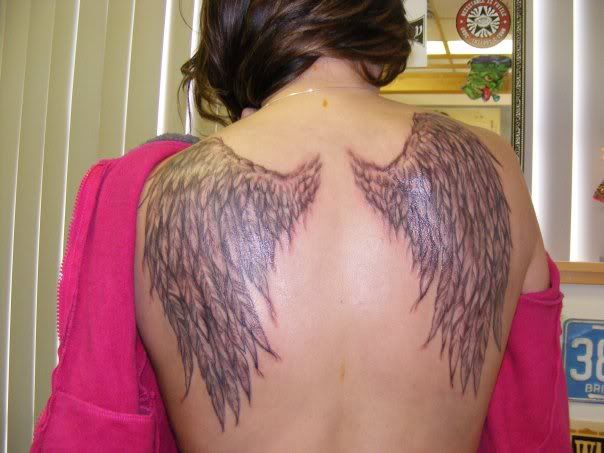
This is how you can get a tattoo done in your body. I know it might sound a very painful endeavor, but the fact is that if you are able to get one done properly and according to your expectation then the feeling is really good (this is from my personal experience). And as far as the pain is concerned it depends on which part of the body you are doing the tattoo. Places like arms and back are less painful but if you are planning to do one on your neck then I must say BRAVO!!